KCF(Kernelized Correlation Filters)
Runs very fast, but the quality is not so good, especially in fast videos.The most common problem occurs when the bounding box loses the object. The larger frames that were automatically generated are important to detect changes in the scale, which represents the size of the objects.
Example of size change: if in one frame the object is smaller and in the next frame the object increases in size, like a person approaching the camera.
Goal
The goal of KCF is to make several adjustments to bounding boxes in order to enclose the object and be able to detect it.
How KCF works?
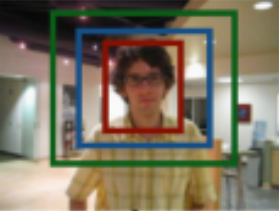
- Frame 1 (Initialization)
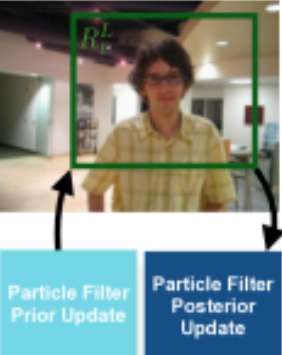
We have the first frame, which is the initialization or the definition of the object to be detected. The algorithm applies a particle filter (red box) and creates two more bounding boxes to cover a larger part of the image (blue box, green box).
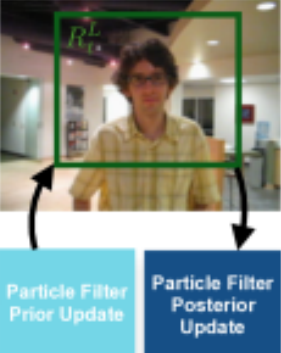
- Frame 2 & Frame 3 (Translation Estimation)
The larger rectangle is used as the green box (filter), and some mathematical calculations are made to adjust the frame in the central parts of the face, as shown in the image below.
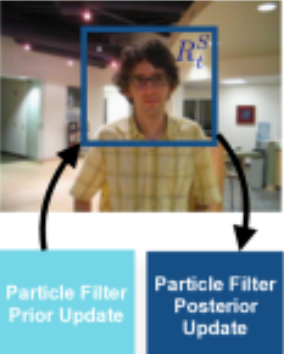
- Frame 4 & Frame 5 (Translation Estimation)
The blue box(filter) is updated to the central position of the face.
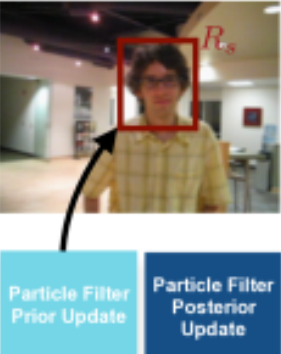
- Frame 6 (Scale Estimation)
The red box(filter) is updated to the central position of the face.
- Frame 7 (Translation Estimation)
Before this step, the first update of all filters is done.From now on, we repeat what we did from frame 2 to frame 6 with the box slightly smaller. This means, it was adjusted to the object.
Exmaple Code
1
2
3
4
5
6
7
8
9
10
11
12
13
14
15
16
17
18
19
20
21
22
23
24
25
26
27
tracker = cv2.TrackerKCF_create()
video = cv2.VideoCapture('race.mp4')
# ok: discriminate open cv correctly reads.
# frame : will start the first frame of the video.
ok, frame = video.read()

bbox = cv2.selectROI(frame)

ok = tracker.init(frame, bbox)

# Accessing frame by frame
while True:
    ok, frame = video.read()

    if not ok:
        break
    ok, bbox = tracker.update(frame)

    if ok:
        (x, y, w, h) = [int(v) for v in bbox]
        cv2.rectangle(frame, (x, y), (x+w, y+h), (0, 255, 255), 2, 1)
    else:
        cv2.putText(frame, 'Error', (100, 80), cv2.FONT_HERSHEY_SIMPLEX, 1, (0, 0, 255), 2)

    cv2.imshow('Tracking', frame)
    if cv2.waitKey(1) & 0XFF == 27: # 0XFF:ESC
        break
Result
A window named ROI selector will appear after existing code above. In the window, select the object you want to track using the mouse, as shown in the image below.
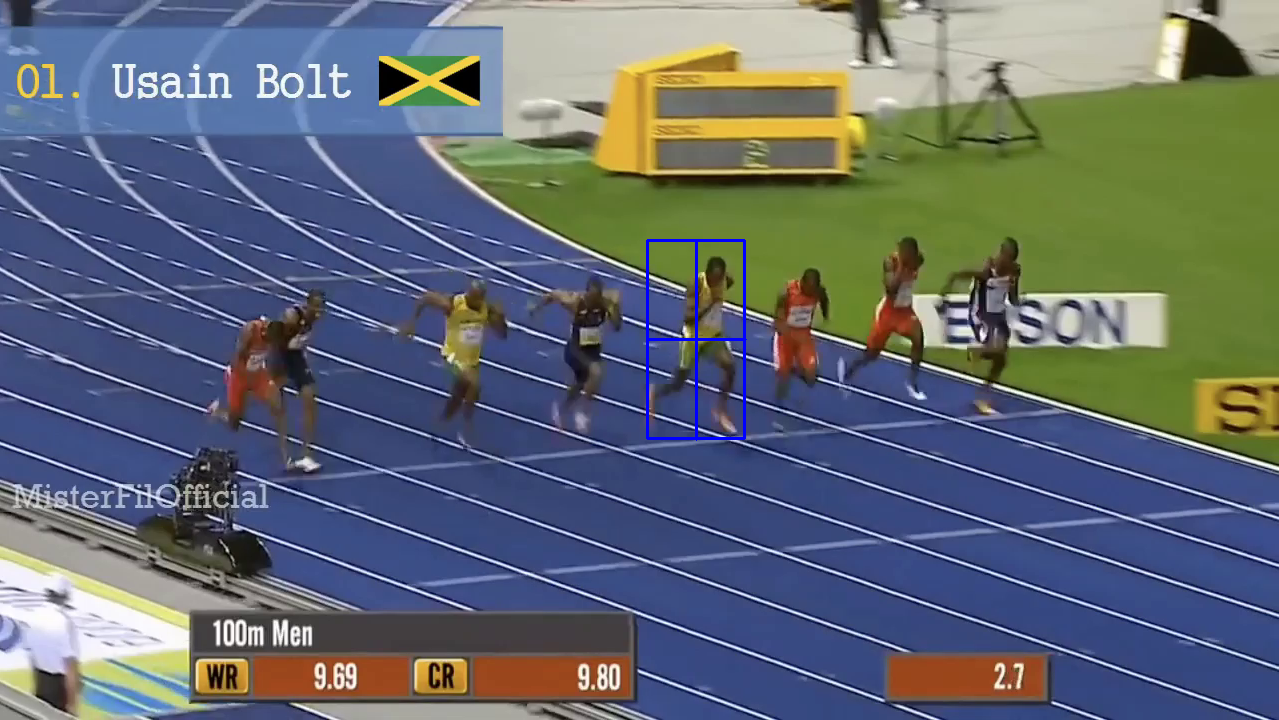
After selecting the object to be tracked, a screen like the one below will appear.
You can see my implementation on my Github